Setup a new Business on Office 365
Domain verification
Register your domain, ie Google Domains or Gandi.net
Go to admin.microsoft.com -> Settings -> Domains
Click Add Domain
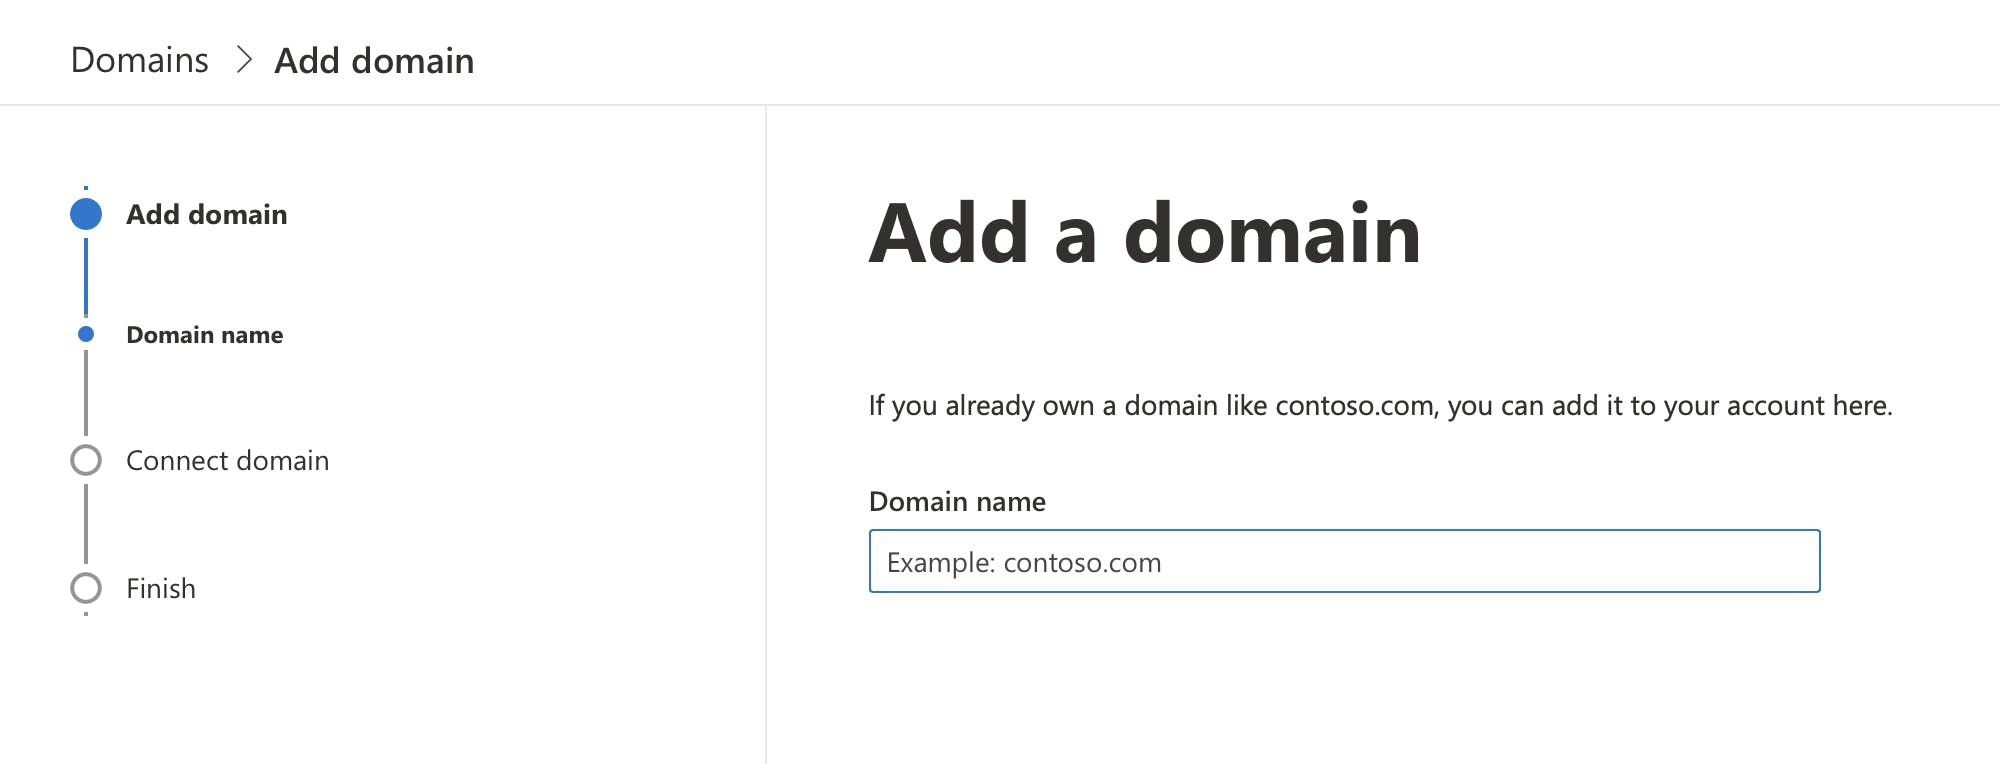
- Insert your domain name and click Use this domain
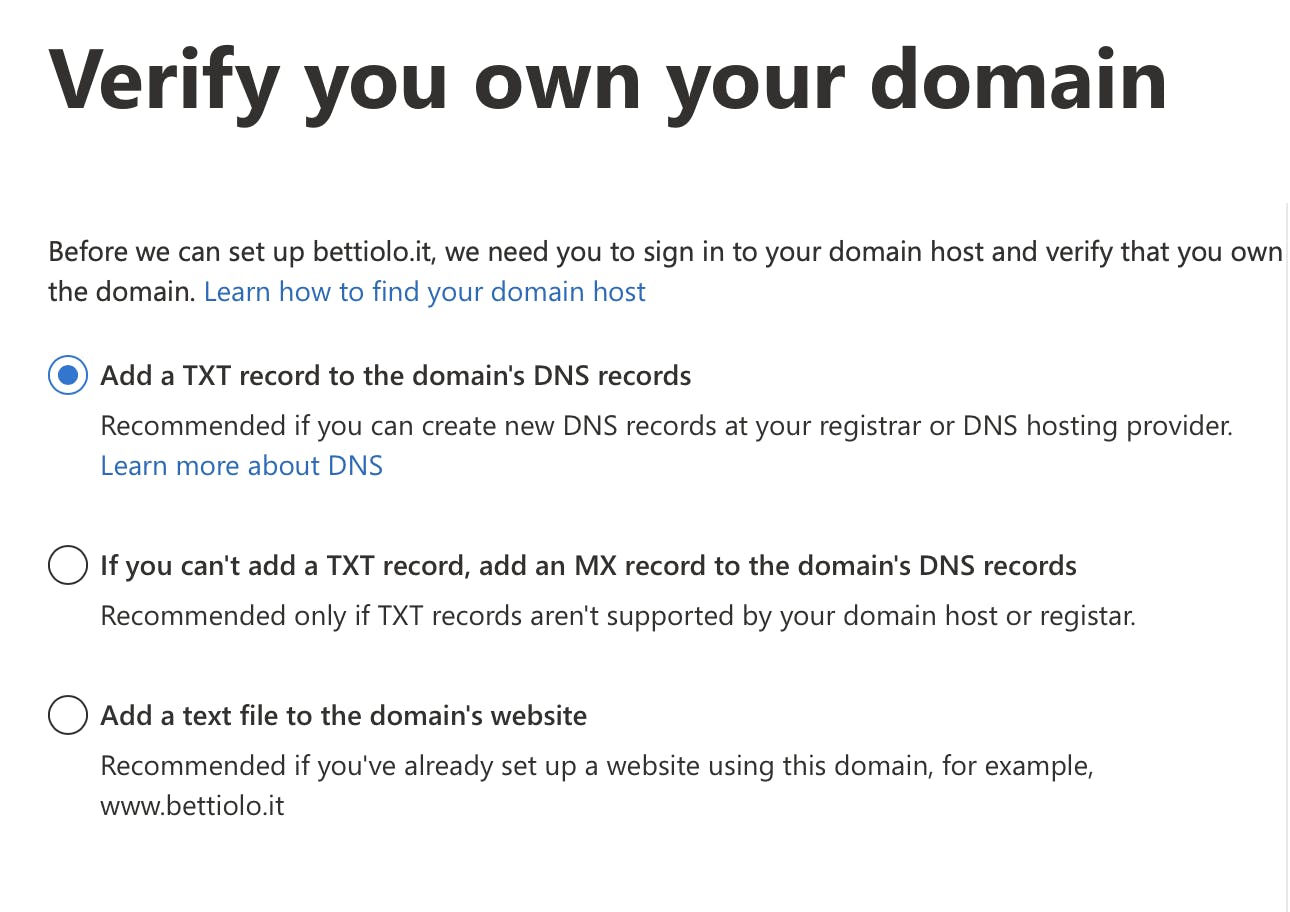
The next page lets you pick how can you confirm that you are the owner of the domain. My favourite way is to add a TXT record to confirm ownership.
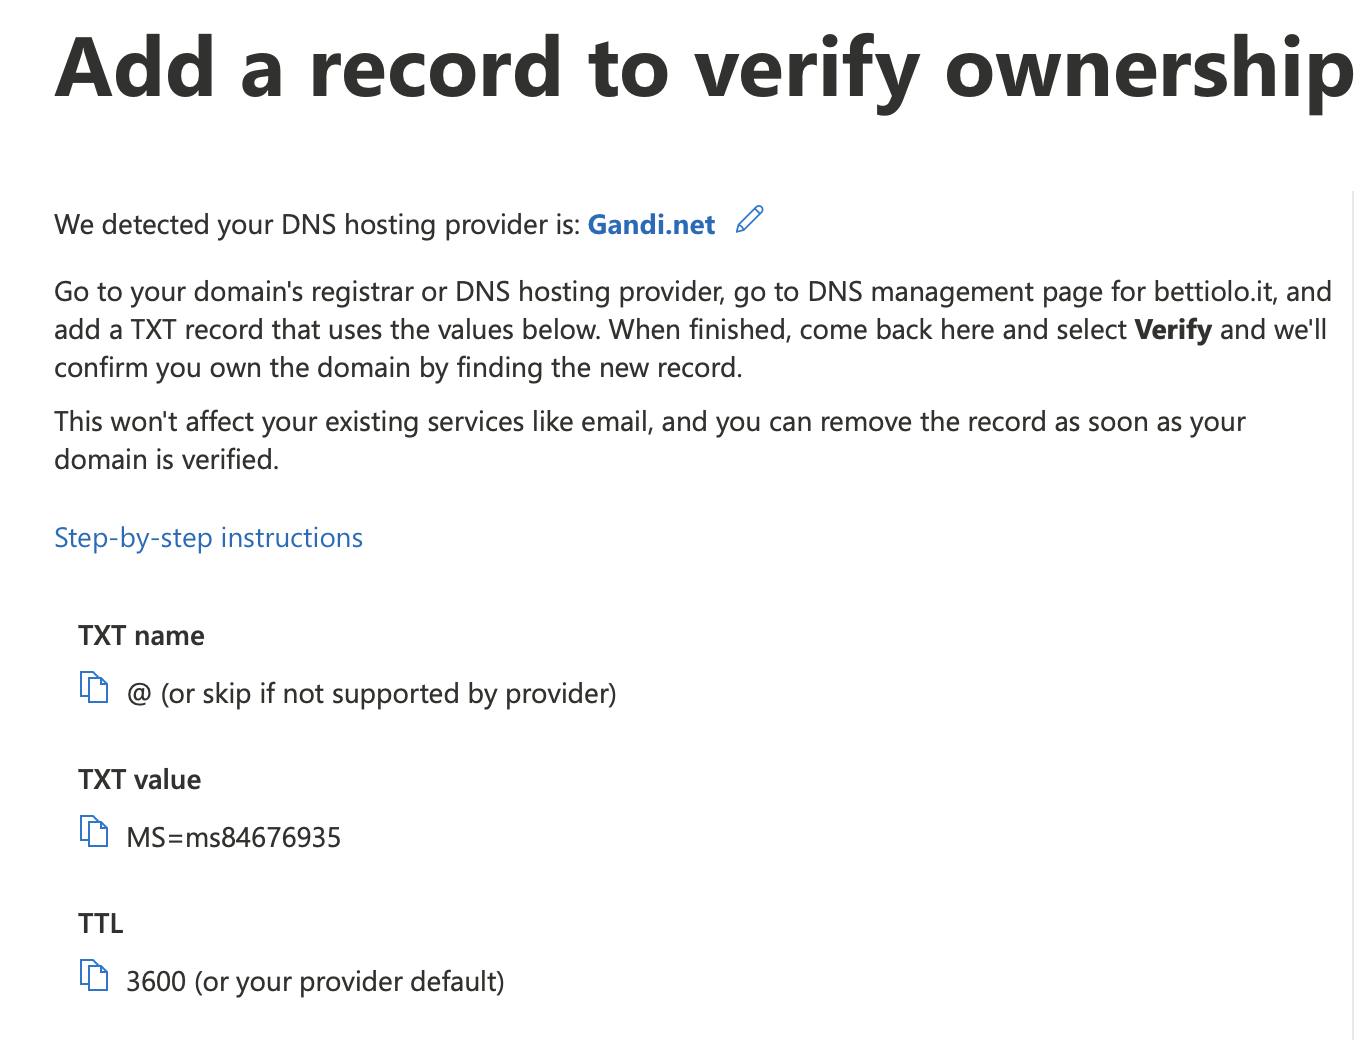
Microsoft will give you a step-by-step guide on how to configure it on your DNS hosting provider.
Go ahead and do that and then click verify. Usually, it takes a while before the changes to the records are propagated and you can continue to the next step.
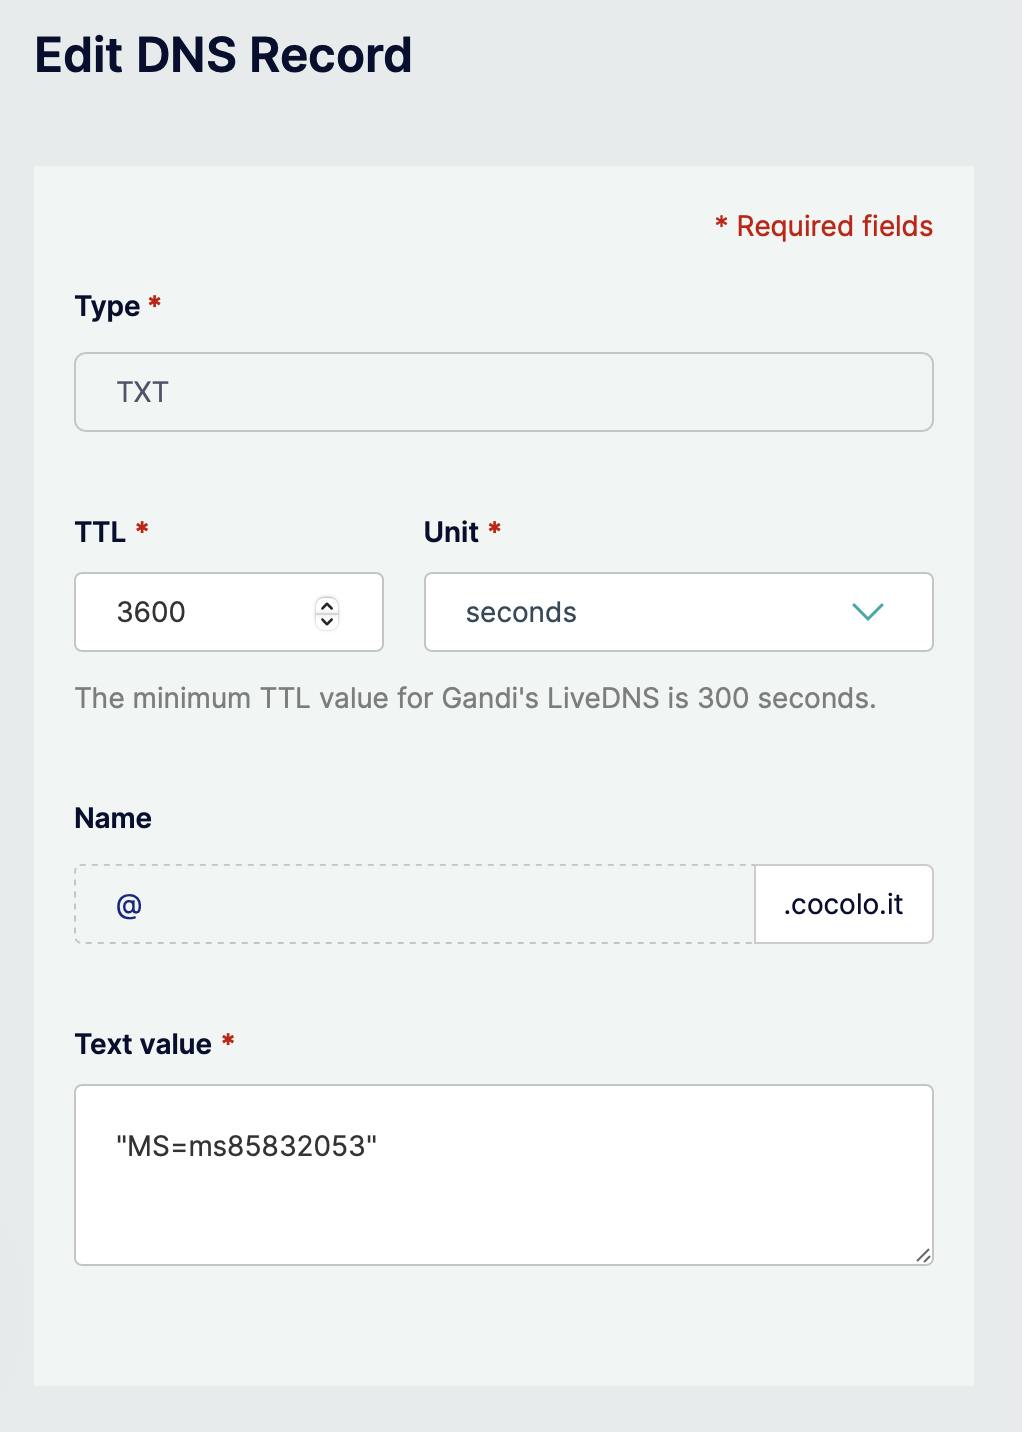
DNS Configuration
Once you can verify the step you need to decide how to configure all the Microsoft services related to the domain. I would advise a small business to just let Microsoft manage the DNS parameters to have less risk of misconfiguring the services.
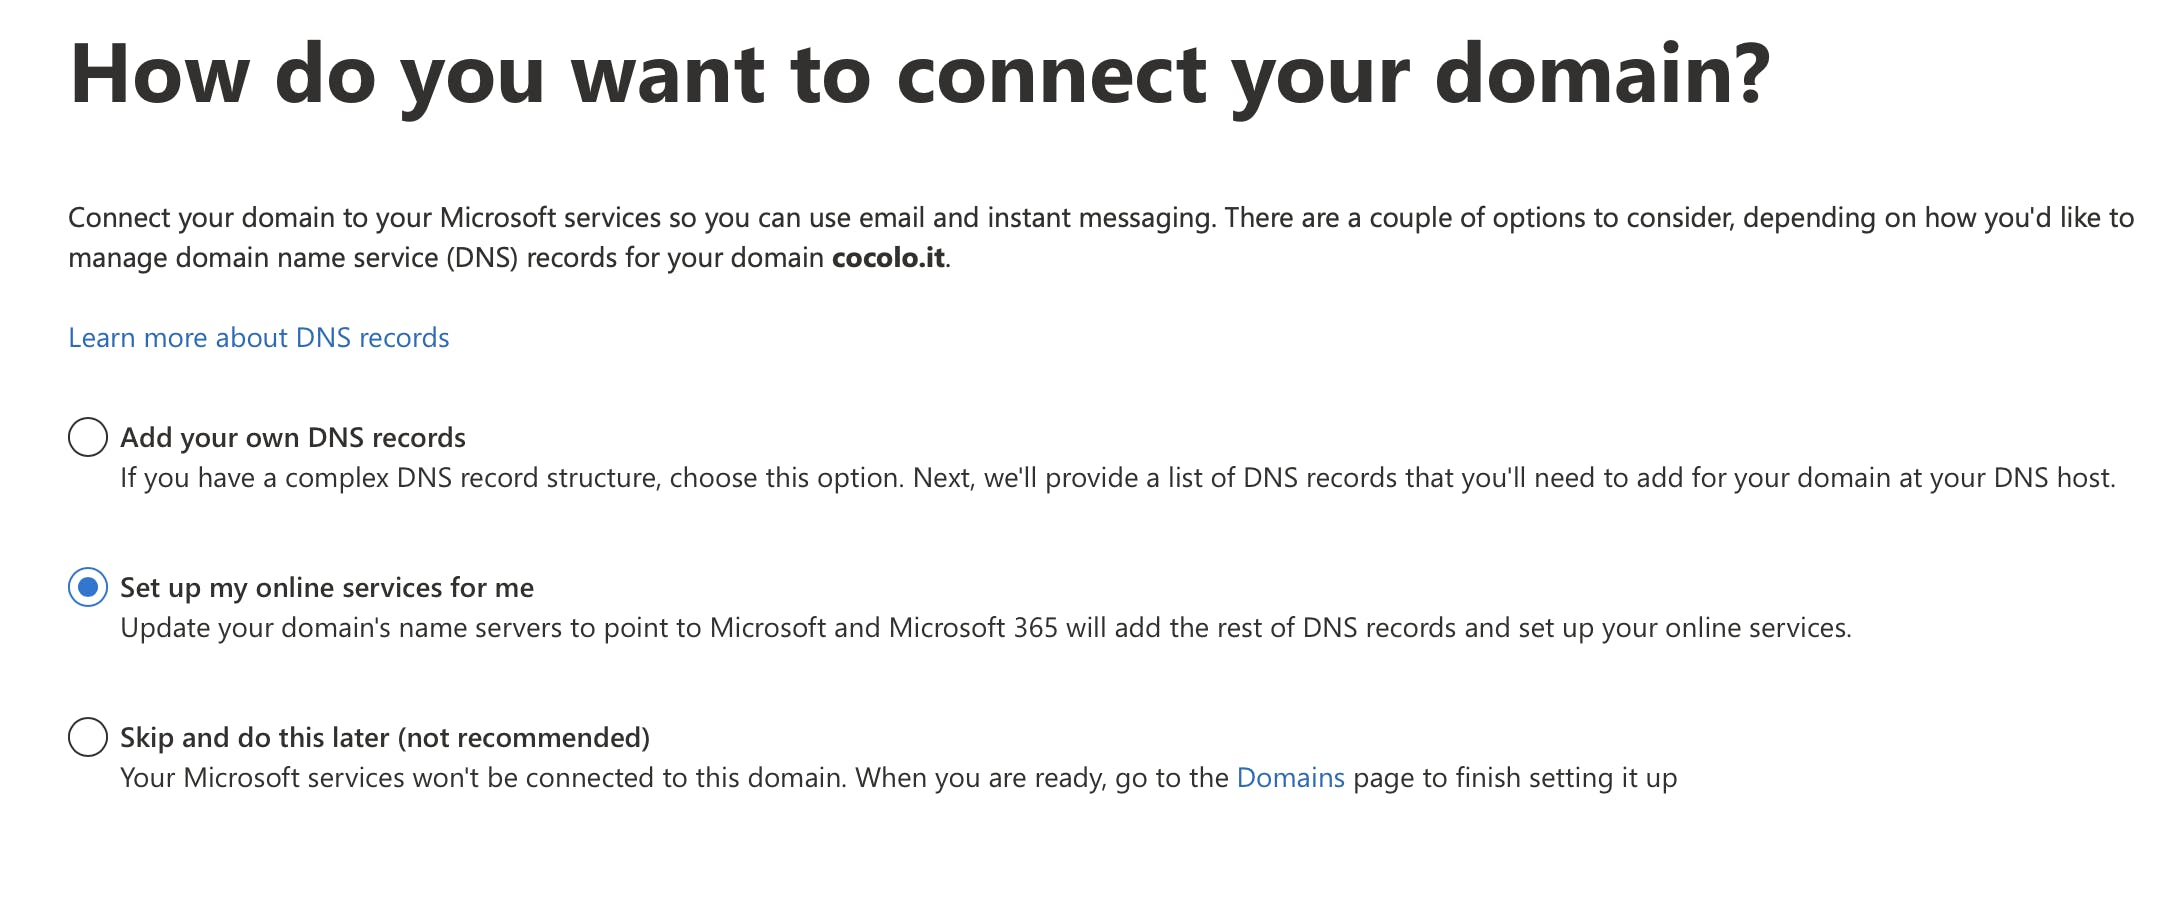
Click on "Setup my online services for me".
In the next step you need to select which services to enable on the domain, please review and click continue to go ahead with the next step.
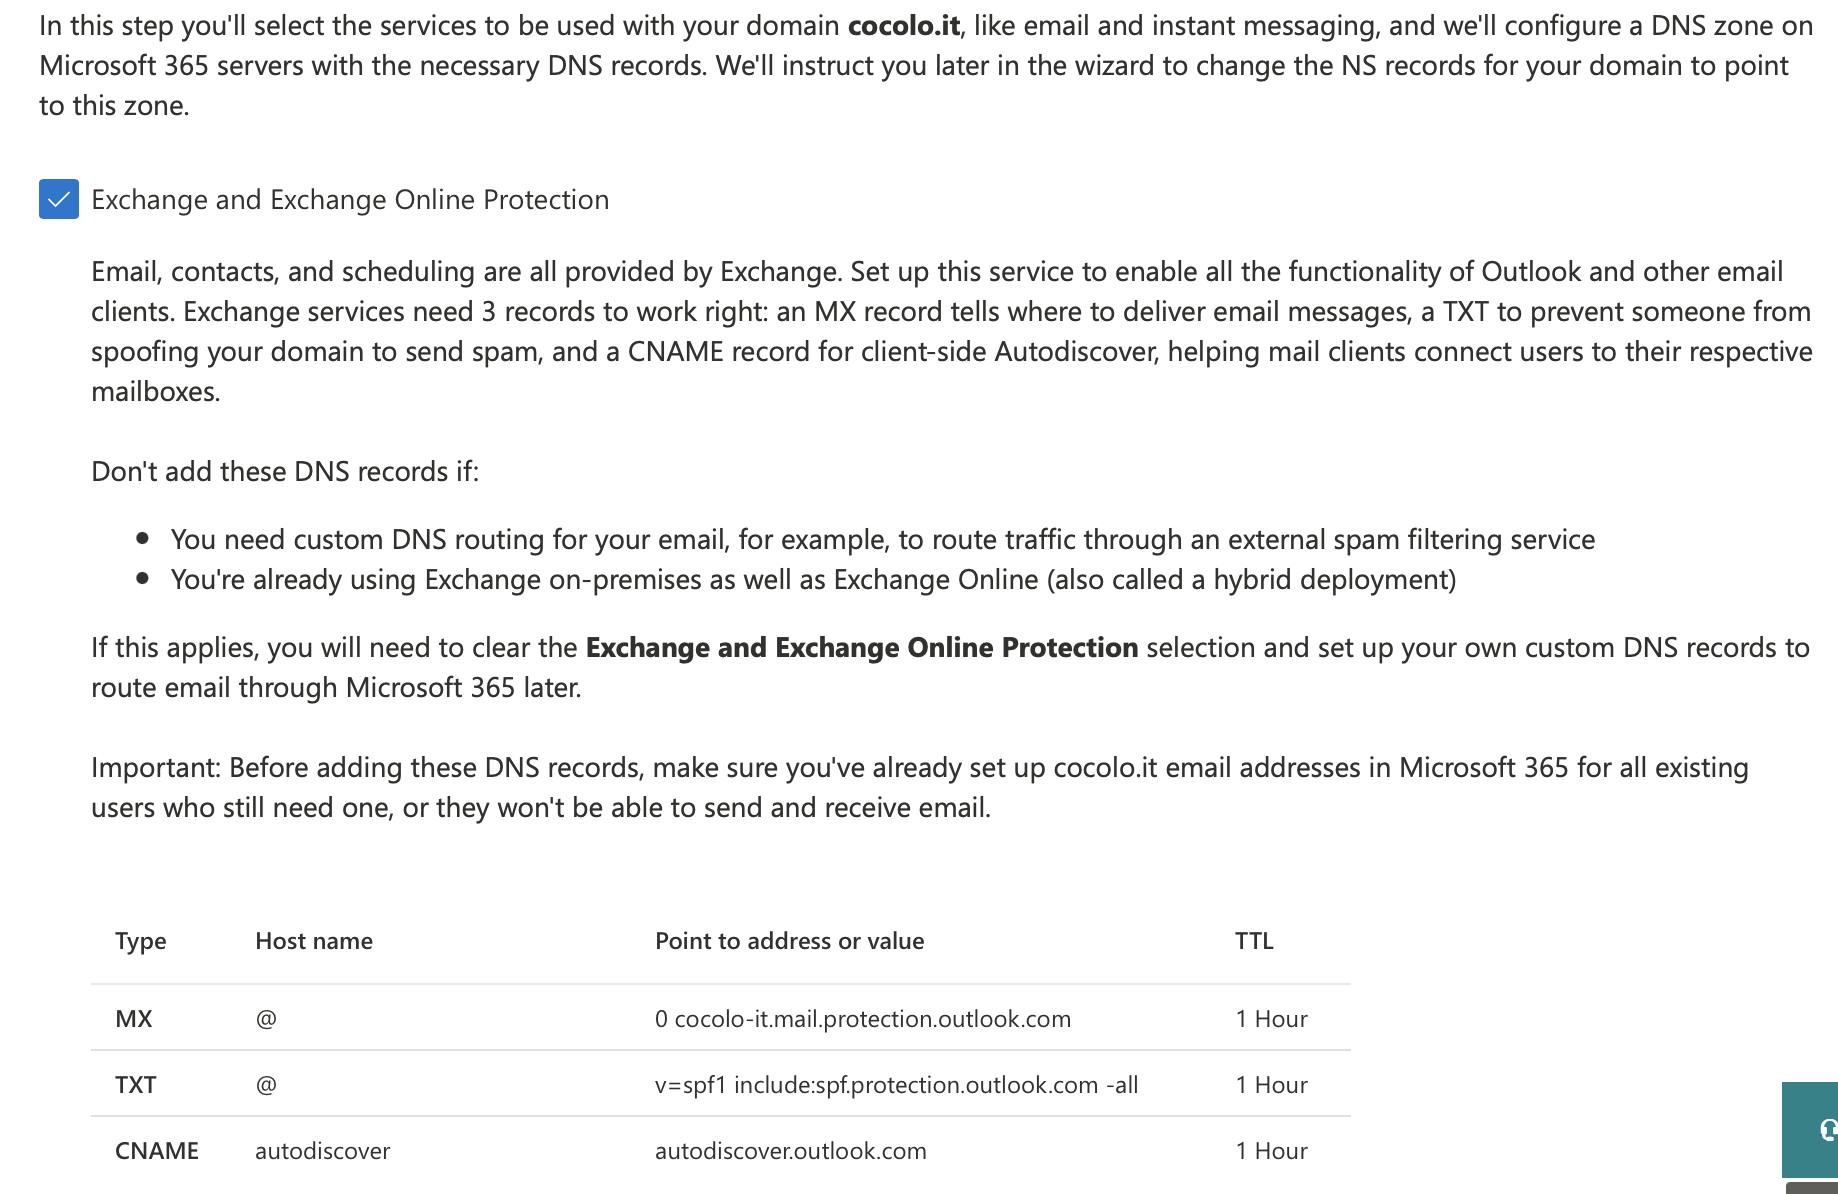
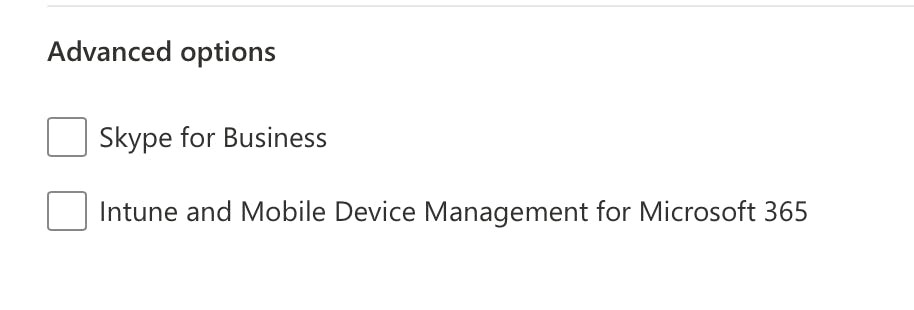
Make sure you review the Advanced options and make sure you keep only the services you need on the domain.
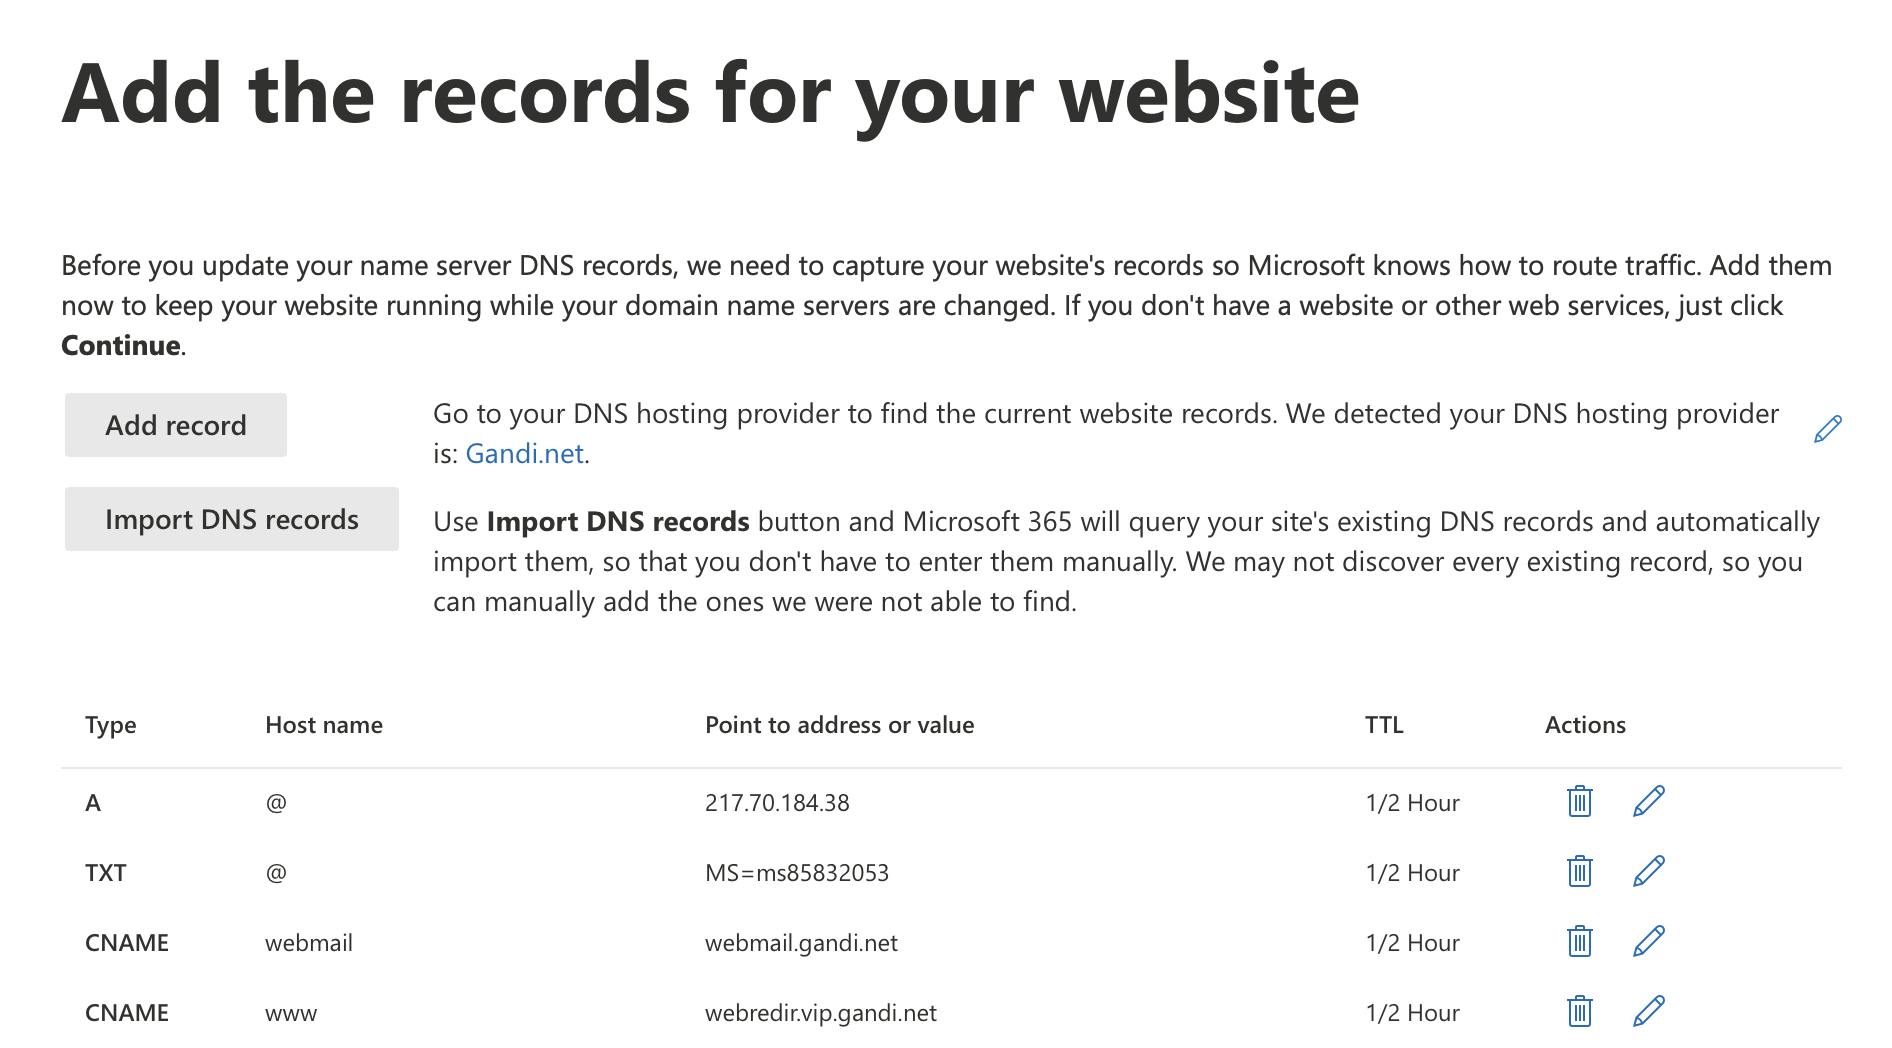
In this step, you can manually add DNS records that you want Microsoft to have on file or you can automatically import what is already configured on your existing DNS server. Generally on the initial setup I click "Import DNS records" and I will adjust later as needed.
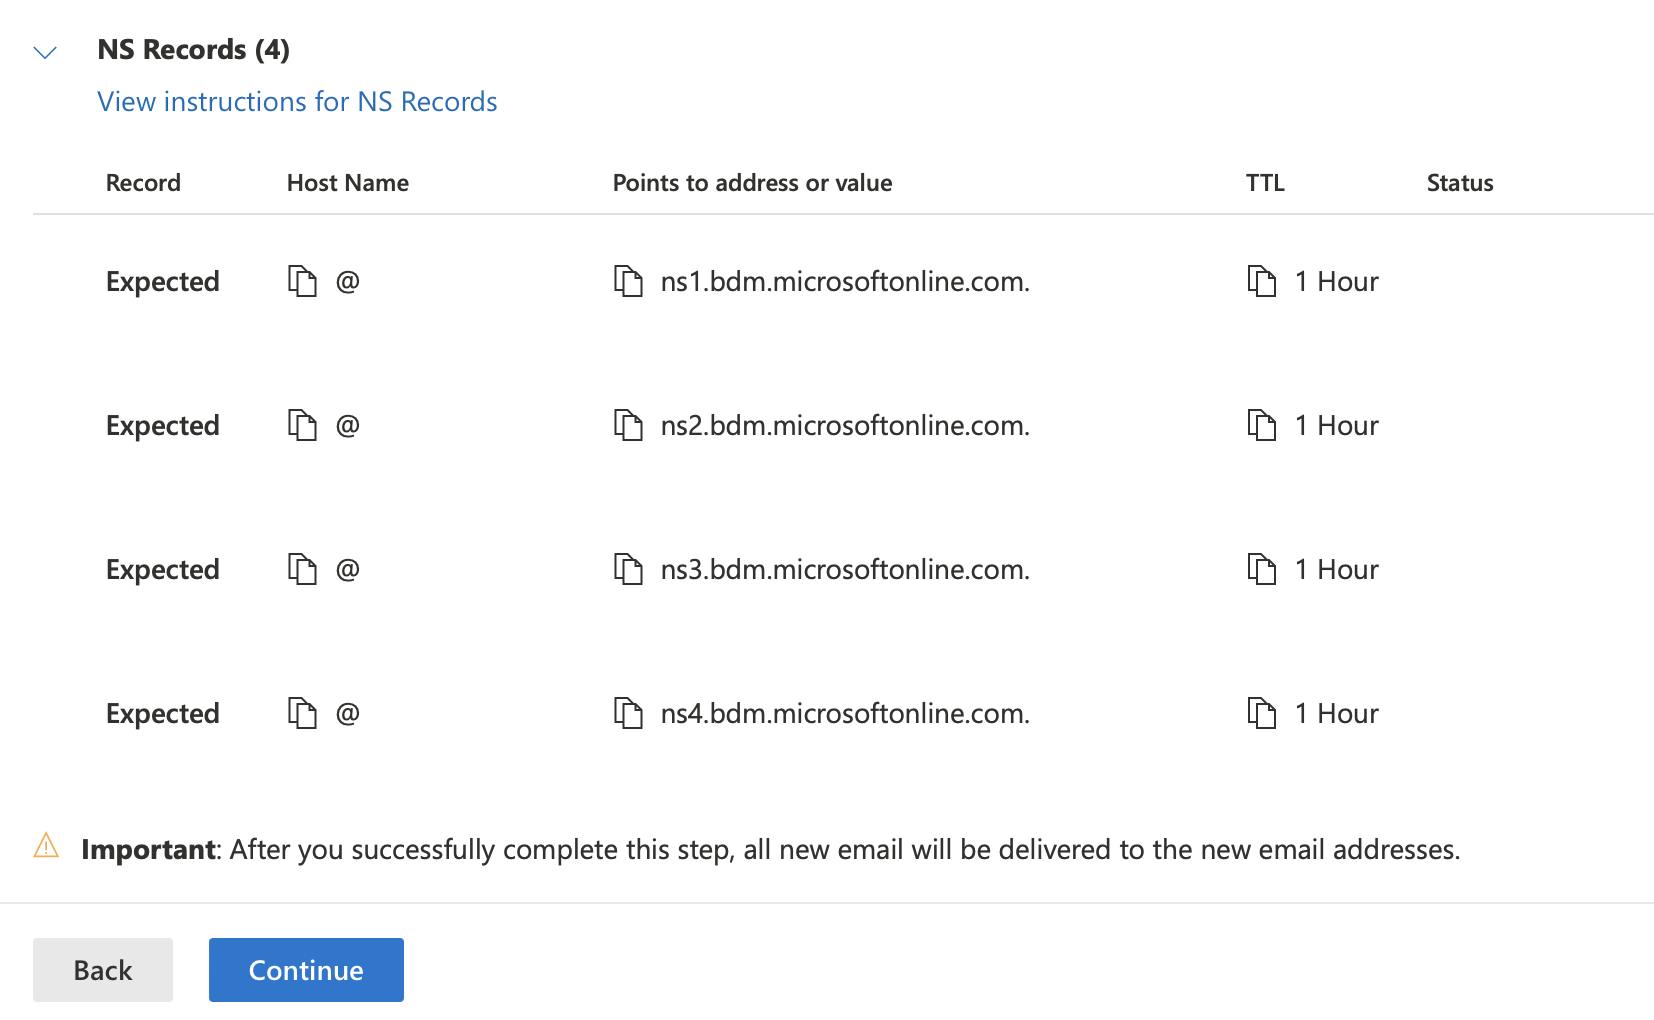
This is now the critical step, you have to tell the world that we want Microsoft to manage the domain DNS records. If you are transferring the email server to Microsoft, this is the step that will enable you to have them process emails.
You will need to add those new name servers to your domain registry provider.
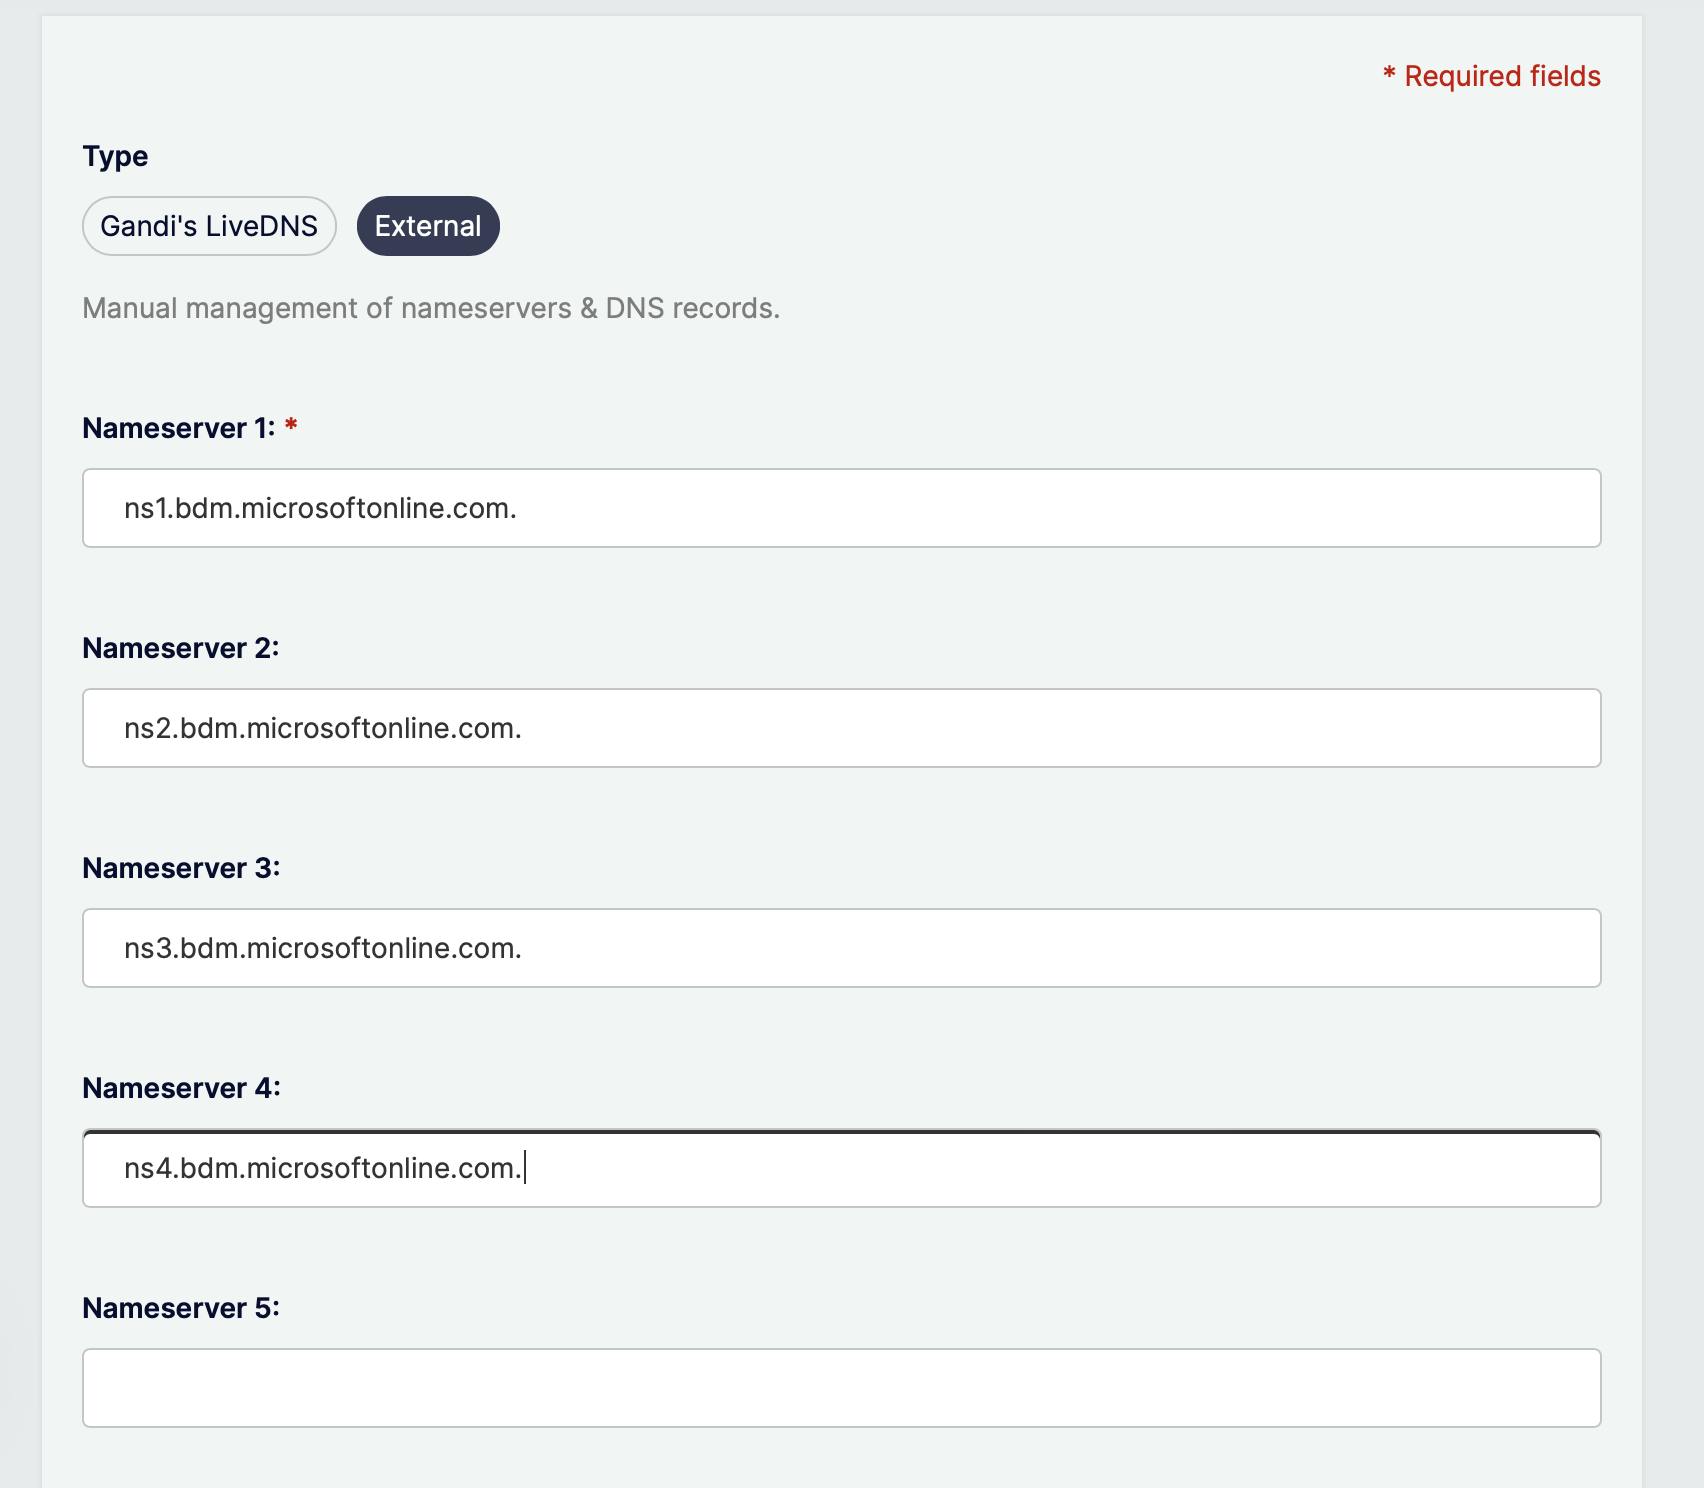
I went ahead and told my registrar that I want to use a different name server and configured the parameters that Microsoft told me.
This might be disruptive if you had services running on the old domain, like websites, email and so on, especially if the parameters weren't migrated correctly to Microsoft.
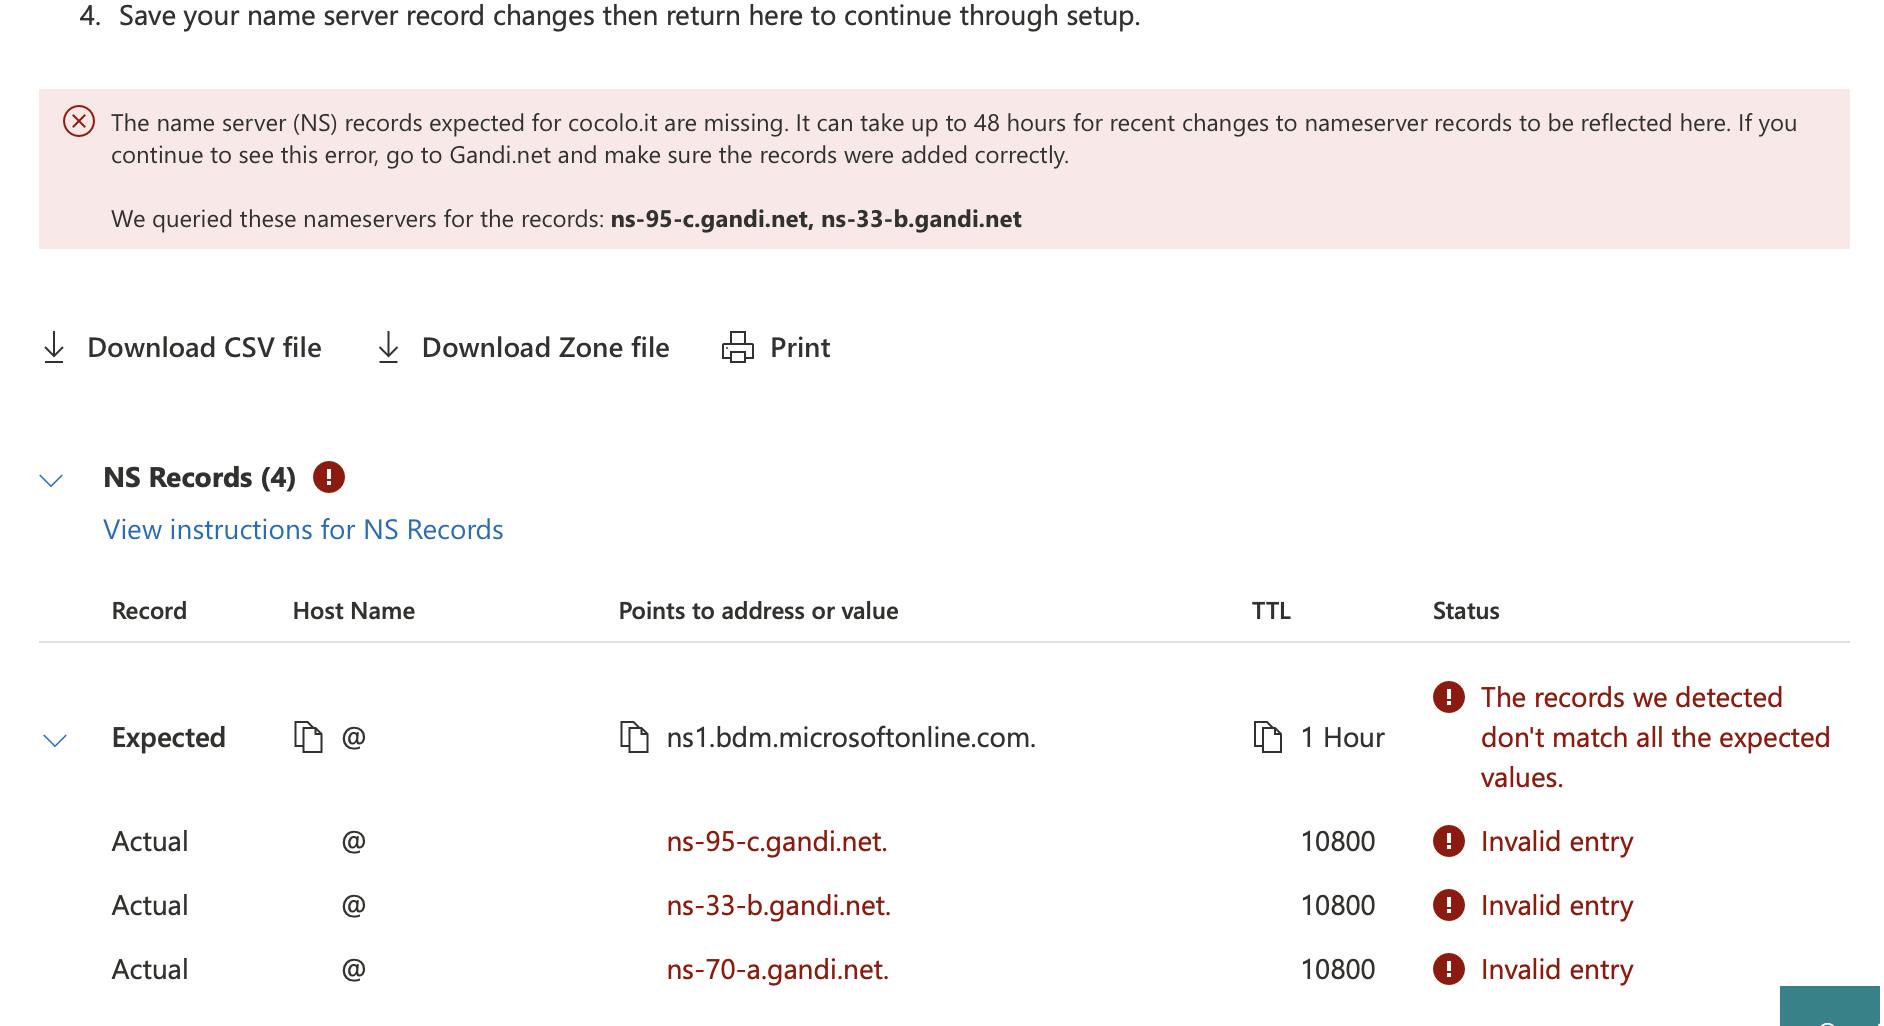
Once you specified Microsoft as the new nameserver you will have to click continue. You might get a scary error as above. This is Microsoft telling you that the changes aren't yet propagated across the world and it is still recording the old name server. It might take hours or up to one day or two for this to be completed. You might need to come back to the above screen if your browser session expires in the meantime.
Once a few hours to a day pass, you should be able to click continue and the domain setup should be completed successfully.
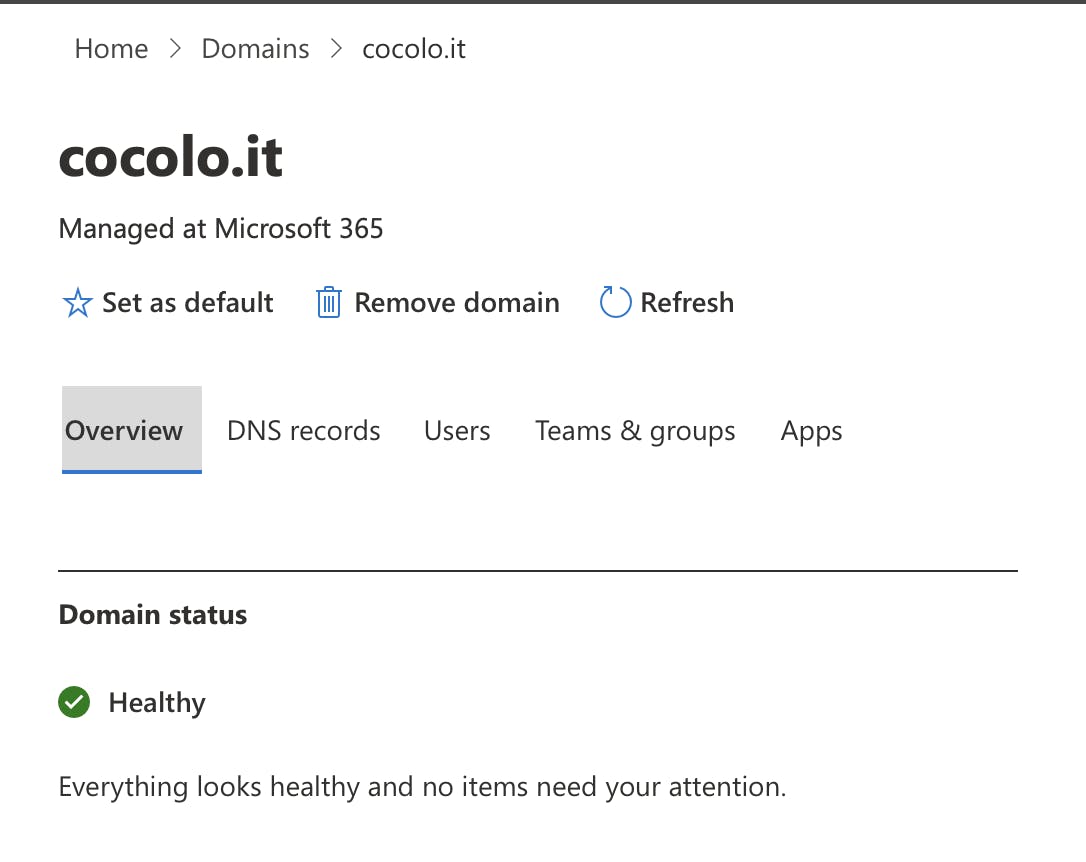
The domain's state will go from "Incomplete setup" to "Healthy".
Congratulations, now you can send emails from your new domain!
Create your fist email address on Exchange
Guide coming soon ...
Shared mailbox
This is great if you want to have multiple users able to manage the same email inbox.
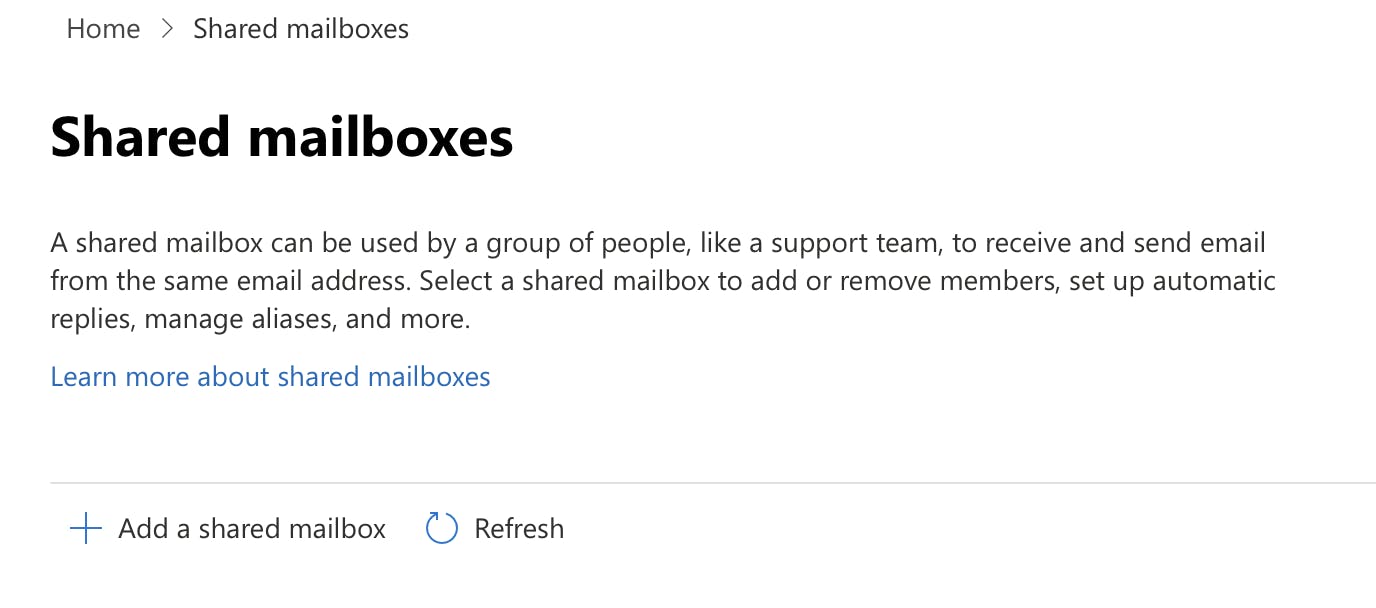
Go to https://admin.microsoft.com and click Teams & groups -> Shared mailboxes. Click Add a shared mailbox
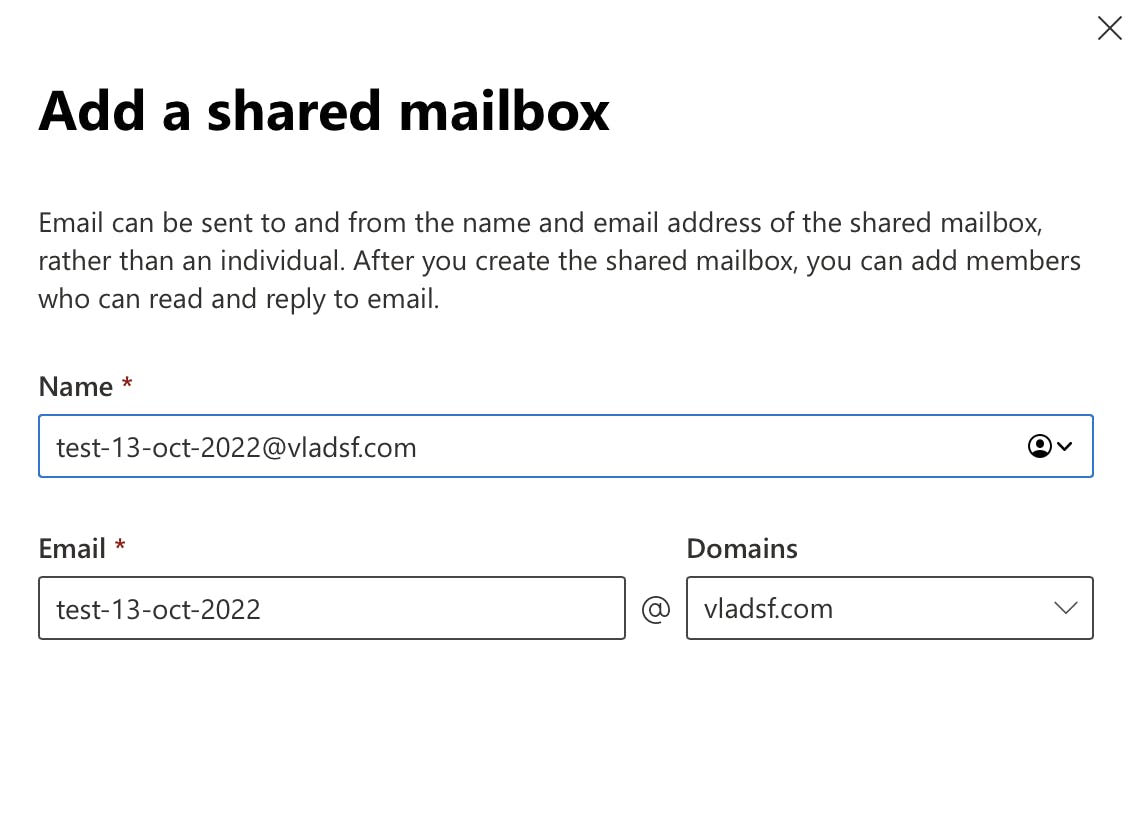
Insert a descriptive name for it and add the email username and click Save changes
Click on the shared email address to edit its settings.
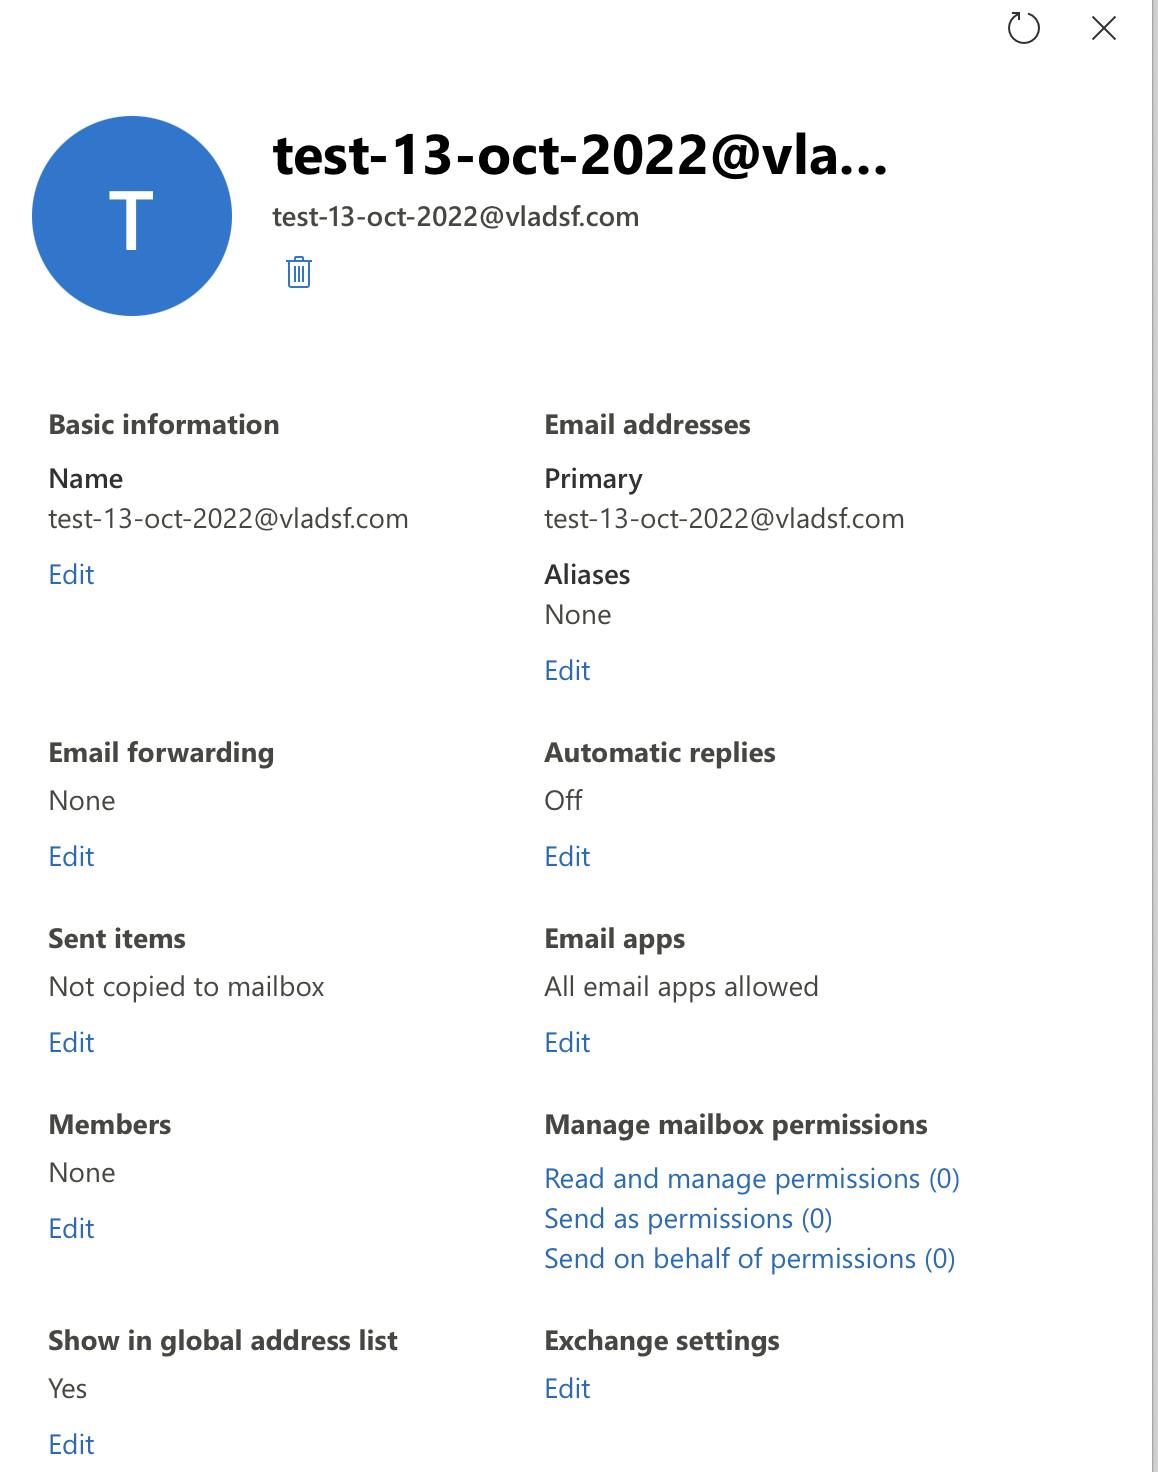
To give users permission to read and "send emails as" to that shared email address click Read and manage permissions.
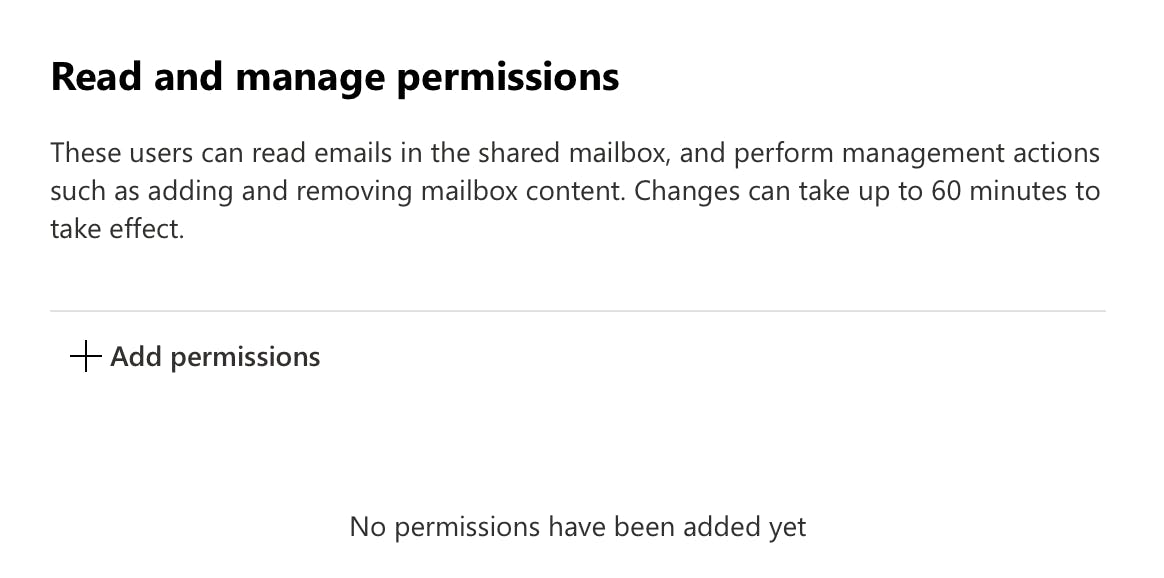
Click on Add permissions to select the users that should be able to have access to the shared mailbox. Once you do that, you want to do the same for Send as permissions and Send on behalf permissions. This will enable users to send a new email as if they were the shared mailbox.
WARNING: Once you do this, you need to wait 30 minutes and tell the users to reboot their laptops and phones otherwise they will not see the shared mailbox in Outlook.
Multiple domain aliases for a user
If you have multiple domain names that you want to be managed by the shared mailbox, you can add them as aliases. To do this click on the shared mailbox to open its settings and click Edit under Aliases.
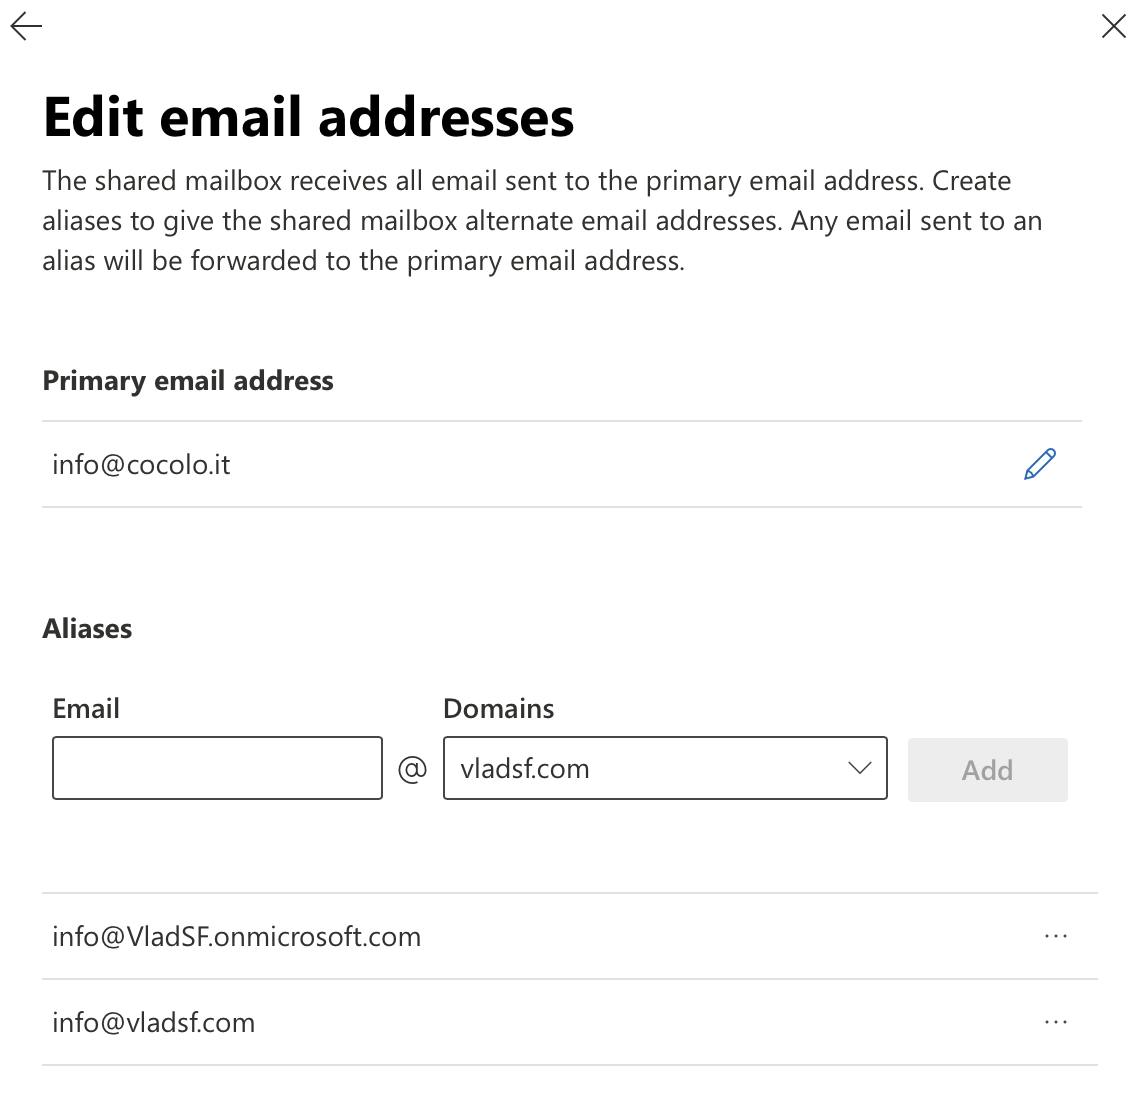
You will have to pick a username and a domain and click Add.
Next steps
Congratulations on getting set up with Office 365 and a custom domain for your business.
Guide coming soon: Set up SPF and DKIM to reduce the likelihood of outgoing being blocked by spam filters.
